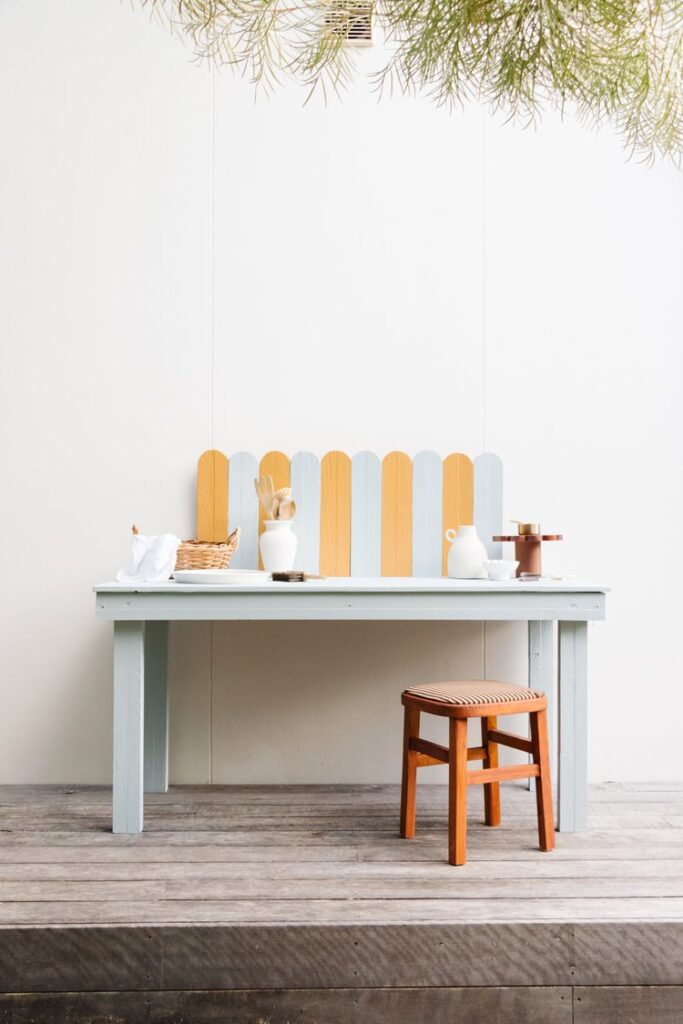
To entertain her kids during the school holidays, Jaharn from Smorhome used an old workbench and some trusty Monarch tools to create a fun mud kitchen for them to enjoy.
Materials required to complete this DIY project
- A pre-loved workbench or timber table to upcycle (from Marketplace, a second-hand store or you may already own one!)
- Monarch Rough & Exterior Surfaces Brush
- Monarch Render & Exterior Surface Brush Pack
- Monarch Paint Tray
- Monarch Leak Proof Canvas Drop Sheet
- Chisel
- Paint
- Reciprocating Saw
- Sander
- Drill
- Jigsaw
- Coaster
- Pencil
- Timber screws
- Salad Bowl
We have put together a step-by-step guide below, detailing everything you need to know to complete this project and recreate the look at home.
Step 1
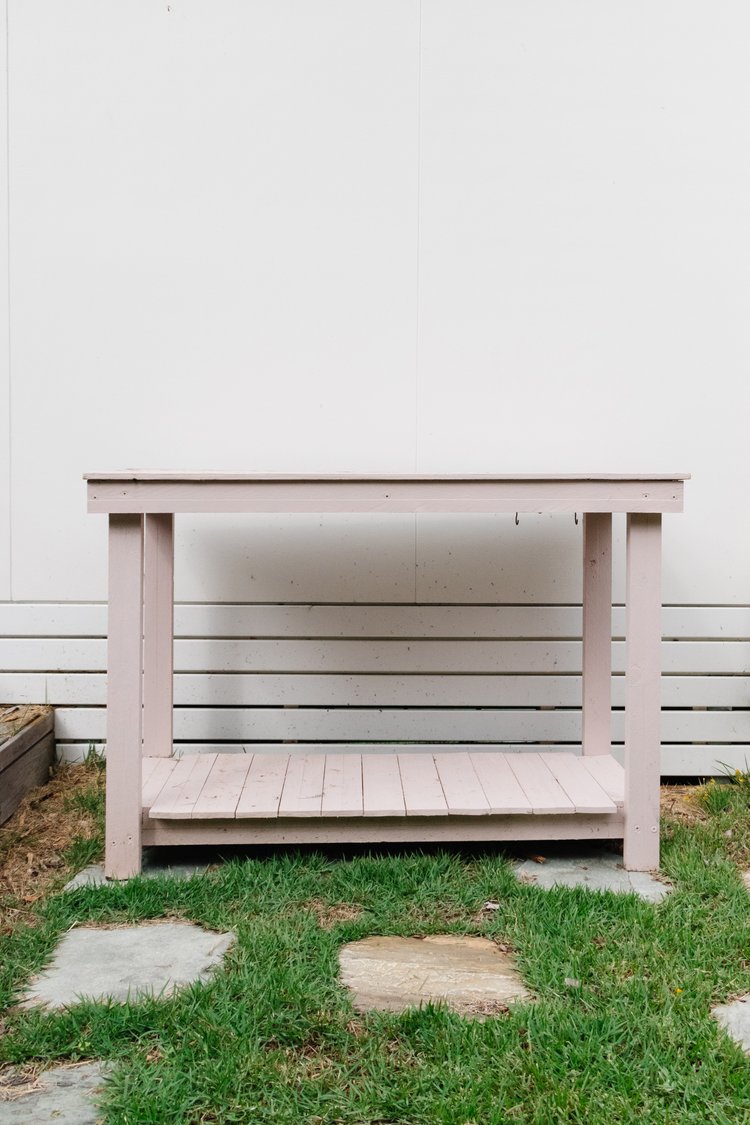
Lay out the drop sheet and use a reciprocating saw to remove the bottom of the workbench.
Step 2
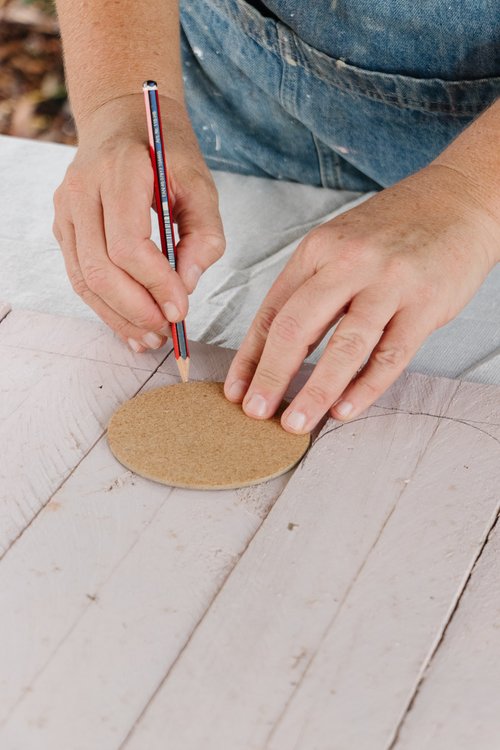
To avoid needing extra timber, Jaharn reused the planks she had cut from the bottom of the workbench to create a little scallop wall in her mud kitchen. She used a coaster to trace semi circles, individually clamped them to the table and then cut the semi circles out using a jigsaw. To smooth out the timber and round the edges Jaharn used a small sander.
Step 3
Sand down the rest of the table to make sure you have a smooth base to apply paint to. To create a sink in the mud kitchen, Jaharn traced around a large salad bowl and proceeded to cut it out with her jigsaw.
Step 4
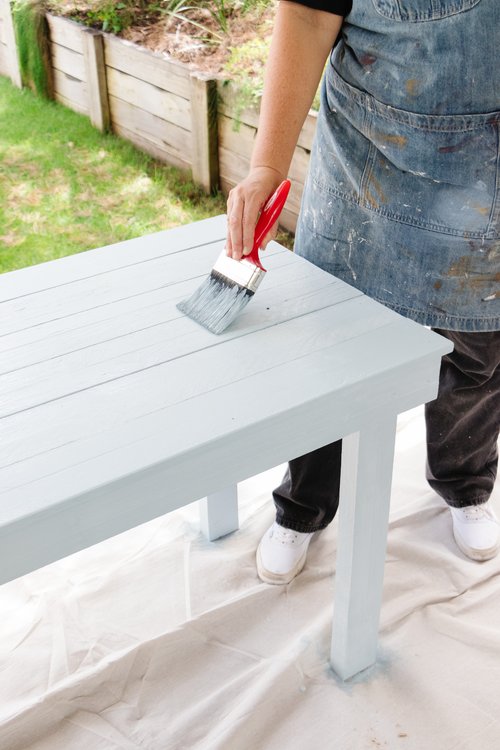
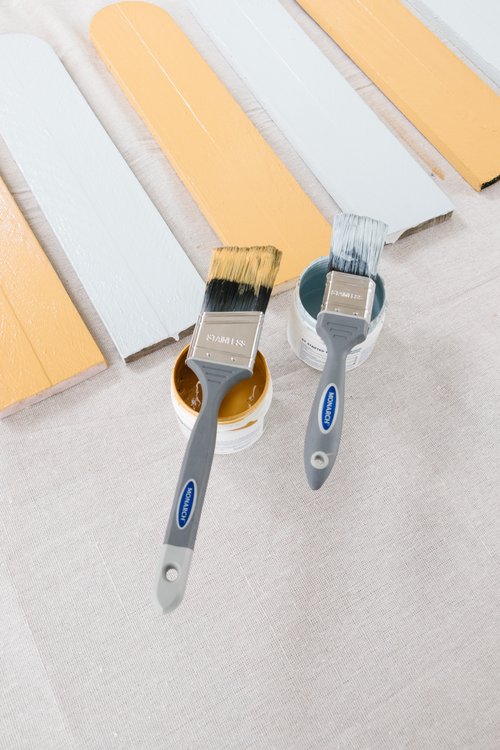
Once you’ve sanded the bench and scalloped timber pieces, it’s time to paint. Monarch’s exterior brushes are super sturdy and work beautifully on rough surfaces. Jaharn used multiple colours to make her mud kitchen fun and eye-catching.
Step 5
Once the paint has dried, place the scalloped pieces of timber paint-side down onto the worktable and secure them together using a piece of leftover timber and screws. Turn the table onto its front and drill the scalloped timber onto the back.
There you have it! A simple mud kitchen that your kids will be sure to love!
For advice on how to select the perfect paint accessory for your next project, take a look at our Painting Tool Kit and discover a bunch of painting tips, tricks and inspiration by following us on Instagram and Facebook.